
7
indicators will light up qa
- press button M again to select LOW misting ow and
one indicator will light up qb
- press button M the third time to turn OFF the misting
function and all indicators will turn o
• Adjusting Fan Angle w
- the fan mist/airow direction can be set to 0° or 30°
- pull out the support bracket H on the back of the fan
and tilt the fan backwards
! make sure the fan is stable before starting
operation
• Using the Fan with Water
- remove one of the water tank covers by turning it
counterclockwise
- add ONLY clean, cold water into the water tank. Do not
overll e
- tighten the water tank cover by turning it clockwise after
lling with water. Wipe the water droplets surrounded
by water tank
- install the battery pack until it snaps into place
- press and hold power and air speed adjustment button
L to turn the fan on and select the fan speed 9
- press misting mode button M to set misting ow q
- when the water tank is empty, an internal safety device
can turn o the misting function automatically
! always ensure the water pipe connecting tank and
fan is secured in position prior to any use of fan.
of the misting function
! do not allow the same water to sit in the water tank
for a prolonged period. It is recommended that
any water left in the water tank be removed and
replaced with clean water regularly
• Using The Fan Without Misting
- if desired, this product may be used as a fan only,
simply
- do not press the misting mode button M q
MAINTENANCE / SERVICE
• Always keep the tool clean
! remove the battery from the tool before cleaning
! cleaning and user maintenance shall not be made
by children without supervision
- use clean cloth to remove dirt, dust, oil, grease, etc.
- avoid using solvents when cleaning plastic part
• Nozzle Cleaning
! ensure that all misting nozzle maintenance is
performed properly to prevent water leaks
- turn o the fan and remove the battery pack
- remove the clogged misting nozzle E ra
- disassemble the nozzle into parts rb
- soak the metal parts in white vinegar or other de-
scaling agent for at least an hour
- use a hard brush to clean any foreign materials
clogging or restricting the nozzle in the front and rear
holes of the nozzle while ushing with water
- ush the nozzle with water
- reassemble the nozzle
- reinstall and tighten the clean misting nozzle clockwise ra
• Filter Cleaning
!
regularly to ensure it is in good condition
• Do not disassemble the battery
• Do not expose product/battery to rain
• Permitted ambient temperature (product/charger/battery):
- when charging 4...40°C
- during operation –20...+50°C
- during storage –20...+50°C
EXPLANATION OF SYMBOLS ON PRODUCT/BATTERY
3
Read the instruction manual before use
4
Batteries may explode when disposed of in re, so do not
burn battery for any reason
5
Store product/charger/battery in locations where
temperature will not exceed 50°C
6
Do not dispose of electric products and batteries together
with household waste materials
7
Protection from splashing water
USE
• Charging battery
! read the safety warnings and instructions
provided with the charger
• Removing/installing the battery 2
! make sure the battery pack is secured to the fan
and the battery compartment cover F is securely
closed before starting operation
• Battery level indicator 8
- press the battery level indicator button K to show the
current battery level 8a
! when the lowest level of the battery indicator
8b, the
battery is empty
!
after pressing button K 8c, the battery is not
within the allowable operating temperature range
• Battery protection
The product is suddenly being switched o or prevented
from being switched on, when
- the load is too high --> remove load and restart
- the battery temperature is not within the allowable
operating temperature range of -20 to +50°C --> 2
levels of the battery level indicator start ashing when
pressing button K 8c; wait until battery has returned
within the allowable operating temperature range
- the battery is nearly empty (to protect against
deep discharge) --> a low battery level or ashing low
battery level 8b is shown by the battery level indicator
when pressing button K; charge battery
!
be damaged
• Power and Air Speed Adjustment Button L 9
- press button L and hold to turn on the fan function; it
will start at low air speed 1 and one indicator will light
up 9a
- press button L again to select medium air speed 2 and
two indicators will light up 9b
- press button L the third time to select high air speed 3
and three indicators will light up 9c
- press button L and hold to turn OFF the fan function
and all indicators will turn o
• Misting Mode Button M q
- press button L and hold to turn ON the fan
- press button M once to turn on the misting function;
the misting will start at HIGH misting ow and two


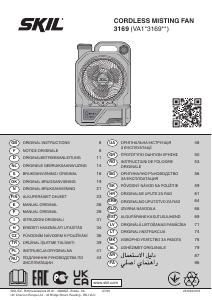
Приклучете се во разговорот за овој производ
Тука можете да го споделите вашето мислење за Skil 3169 CA Вентилатор. Ако имате прашања, најпрво прочитајте го прирачникот. Можете да побарате прирачник ако го употребите нашиот прирачник за контакт.