
2. Open the shaver heads (fig. 17). Turn the lock counterclockwise to remove old blades and covers.
1. Switch the shaver off, unplug the power cable and unplug the small plug off the shaver.
Replace the shaving heads every year to ensure optimal device operation. The shaver has long durability if used according to the
manual. Damaged or worn shaving heads should be replaced only with original shaving heads.
Blade replacement
3. Every 6 months oil the trimmer teeth with machine oil (fig. 16).
2. Clean the trimmer using the attached brush (fig. 15).
1. Switch the shaver off, unplug the power cable and unplug the small plug off the shaver.
Clean the trimmer after each use.
Trimmer cleaning
4. Close the head until it snaps.
3. After cleaning put the blades into the cover and place the set in the casing, watching the guiding cuts on the cover edge (fig. 14).
Make sure the cut on the cover edge matches the tooth on the head casing. Next, put the securing element back on and turn the lock
clockwise.
The heads can be water rinsed.
2. Clean the blades and covers using the attached brush (fig. 13). Clean only one set of blade and cover per time. Do not mix the
blades and covers. The effective operation of each set can be assured only by exact fit of blades to covers.
1. Open the shaving assembly, turn the lock conterclockwise (fig. 12), remove the securing element, and remove the blades.
18. Do not touch the device or power adaptor with wet hands.
17. If the device falls into water, immediately remove the power plug or power adaptor from
the socket. If the device is powered, do not put hands in the water. Have the device
checked by the qualified electrician before using it again.
19. Never use this device close to water, e.g.: under shower, in bathtube, or above
sink filled with water.
20. If the device utilises a power adaptor, do not cover it, because this can cause a
dangerous temperature rise and can damage the device. Always connect the power
adaptor cable to the device, and then connect the power adaptor to the power socket.
21. The shaver charging temperature should not be above 35 degrees Celsius or below 5
degrees Celsius.
23. Do not use towel or paper tissues for cleaning of shaver head, as they can damage the
head.
22. Only the shaver head can be washed in water, the other parts of the shaver cannot be
immersed in water. Be careful, the hot water can cause burns to your hands.
SHAVER CHARGING
1. Switch the shaver on using the button on the housing.
2. Move the shaver head along the skin, making straight as well as circular moves (fig. 5).
3. After each use put the protective cover on for protection of the shaving heads against the mechanical damage (fig. 6).
USING SHAVER, SHAVING
4. If the battery is discharged during shaving, you can charge the shaver for a couple of minutes in order to finish shaving.
3. After full charging of the shaver, unplug the charger from the power socket, then disconnect the cable from the shaver.
Before charging make sure, that the shaver is switched off. Charging takes about 8 hours. The shaver cannot be plugged to the power
socket for longer than 24 hours.
1. Connect the charger cable to the shaver (fig. 3).
Clean the head and hair container daily.
1. Move the slide upwards to open the trimmer. You can use trimmer after switching the device on (fig. 7).
Cleaning shaver heads (every 6 months)
Frequent shaver cleaning ensures better shaving results.
For sideburns and moustache shaping.
2. Push the release button (fig. 8, 1), the shaving assembly will open (fig. 8, 2).
3. Every few shaves sweep out the cut hair out of the heads and container with attached brush.
CLEANING AND MAINTENANCE
2. The charging LED will illuminate (fig. 4).
1. Switch the shaver off, unplug the power cable.
16. Do not allow the device or power adaptor to wet.
USING TRIMMER, TRIMMING
4



Приклучете се во разговорот за овој производ
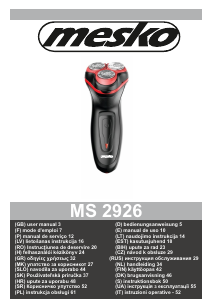
Тука можете да го споделите вашето мислење за Mesko MS 2920 Апарат за бричење. Ако имате прашања, најпрво прочитајте го прирачникот. Можете да побарате прирачник ако го употребите нашиот прирачник за контакт.
одговор | Ова беше корисно (0) (Преведено од Google)
одговор | Ова беше корисно (0) (Преведено од Google)