
5
The cooking container must be large enough to hold food bag(s) with plenty of room for water to circulate entirely around each food bag.
It is recommended to use a large metal pot of 24 cm (9.5”) diameter with a wall height of 17-20 cm minimum. The maximum container
capacity should not exceed 20 liters.
1. Select a proper cooking container:
Steps to sous vide cooking:
Anytime during the cooking or preheating phase you can pause the device by pressing the Start Pause button (C5). Do not pause the
cooking for more than 2 minutes as the cooling water might change too much for perfect results. Press the Start Pause button (C5) again
to resume the cooking process.
Pause Function:
6. After the countdown is finished the device will emit an Beeping noise and the ring around the control panel will change color to
Green.(B3) After that please remove the device, dry it with a paper towel and leave to dry before packing.
You can do that by connecting the device into the wall outlet and pressing the + / - (C4) buttons at the same time for 3 seconds. The
device will then emit a beeping sound confirming the change of the configuration.
NOTE: You can change the cooking process startup procedure to start the cooking process right after the preheating phase.
5. To start the cooking process press the Start Pause button (C5) for 3 seconds. The device will emit a beeping sound and the ring will
change to red color signaling the cooking process (B1).
4. Once the preheating stage is complete the device will signal it with a beeping sound. Please only then add the previously prepared
bags into the water.
3. Once the desired temperature and time have been set press the Start pause button (C5) to start the water heating process. Note that
the ring around the control Panel will turn Blue for the heating process.(B1)
2.3 You can use the Setting button (C7) to toggle between the time and temperature settings until you are satisfied with the setup.
2.2 Then the set time icon will light up (C3). Use the + / - buttons to set the desired hours and then press the Setting button (C7).
Confirm the set time with the setting button (C7).
2.1 After first press the temperature icon will light up (C6) after second press the Set timer will light up(C3). Use the + / - buttons to set
the desired temperature. Confirm with the setting button (C7)
2. Press the Setting button (C7) to adjust the cooking settings:
1. Plug the power cord into an 220-230 V AC wall outlet to turn the device on. The device wil beep and on the Control Panel (A1) the
current temperature will appear.
NOTE: During first use of the appliance, smoke and/or a slight odor may occur from the appliance because of the initial warming process
of the materials. This is normal and will quickly disappear. It will not recur after appliance has been used a few more times.
Using the device:
7. setting button: to set cooking time and temperature
6. set temperature icon
5. start/pause button
4. +/- : cooking time and temperature adjustment buttons
3. set timer icon
2. set cooking time and set water temperature display
1. current water temperature display
C:
Control Panel:
3. Compleated mode
2. Cooking mode
1. Preheating mode
B:
COOKING PHASE LED INDICATOR:
10. removable cap
9. water circulator
8. stainless steel heating element
7. clamp
6. water flow channels
5. minimum (MIN) and maximum (MAX) water level indicators
4. stainless steel removable element cover
3. motor body
2. LED light ring
1. digital control panel
A:
Device Desctription:
21. The device is not intended to be operated with an external timer or other remote control
of the power supply.
20. Before removing the heater from the liquid, disconnect the plug from the power socket.
or placed on any flammable surfaces.


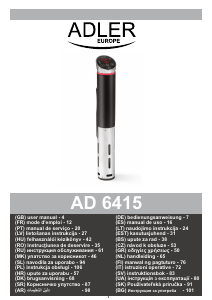
Приклучете се во разговорот за овој производ
Тука можете да го споделите вашето мислење за Adler AD 6415 Стапче Sous-vide. Ако имате прашања, најпрво прочитајте го прирачникот. Можете да побарате прирачник ако го употребите нашиот прирачник за контакт.
одговор | Ова беше корисно (2) (Преведено од Google)
одговор | Ова беше корисно (0) (Преведено од Google)
одговор | Ова беше корисно (0) (Преведено од Google)
одговор | Ова беше корисно (0) (Преведено од Google)
одговор | Ова беше корисно (0) (Преведено од Google)